
Want a thoughtful and creative way to surprise someone special in your life? Say no more – I’ve got you! A DIY gift bouquet is the perfect way to add a more personal and intentional touch to any present. It’s beautiful, budget-friendly, and full of love. Whether it’s for a birthday, graduation, or “just because,” this guide will show you exactly how to create a gift bouquet that will make them say “Wow, this is the most thoughtful gift ever!” and looks amazing on Instagram.
I’m breaking it all down below – from what to include, how to assemble it, and bouquet theme ideas. Let’s get into it.
What Is a Gift Bouquet?
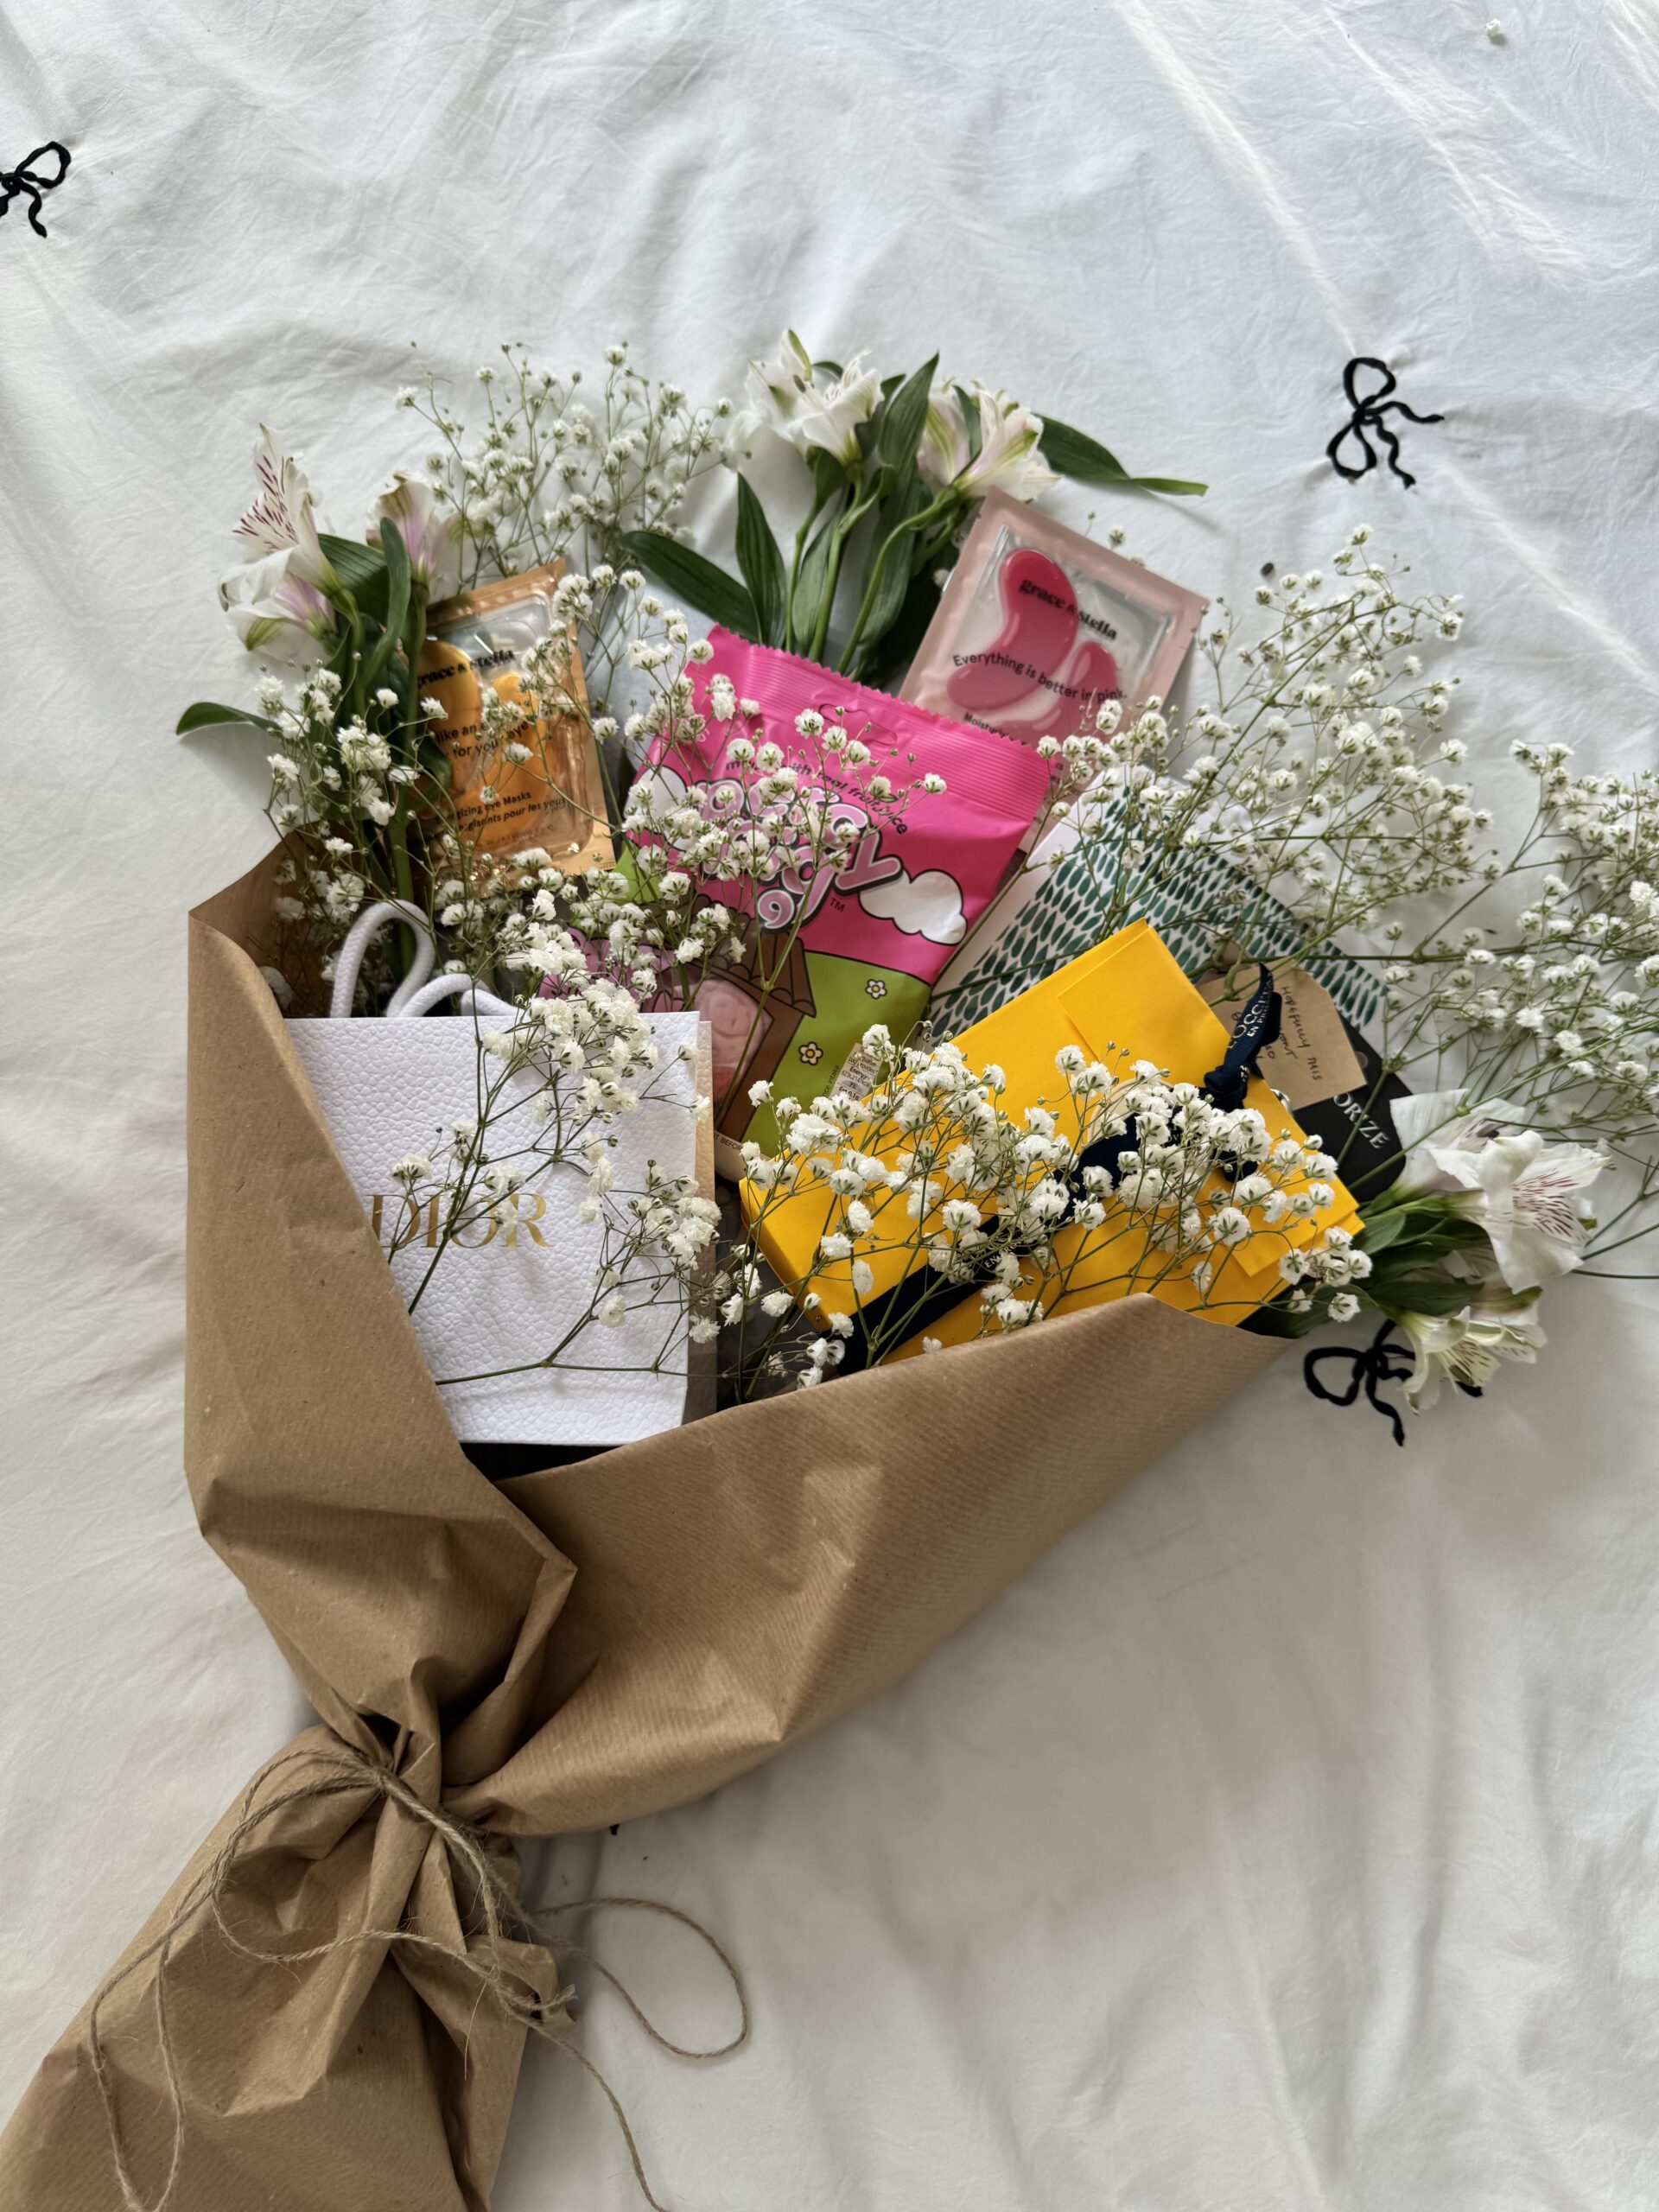
A gift bouquet is a fun, creative twist on the traditional flower bouquet, except instead of flowers, it’s filled with small gifts, treats, and personal touches. Think: books, mini skincare, favourite snacks, candles, coffee sachets, beauty products, stationery, photos- basically, anything cute and small enough to fit on a stick.
You can make it extra special by tailoring it to the person you’re giving it to. Whether they’re a Swiftie, reader, matcha girlie, makeup guru, or a hot sauce connoisseur, there’s a bouquet vibe for everyone!
What You’ll Need
Here’s what I used to make mine (feel free to customise based on your friend’s preferences):
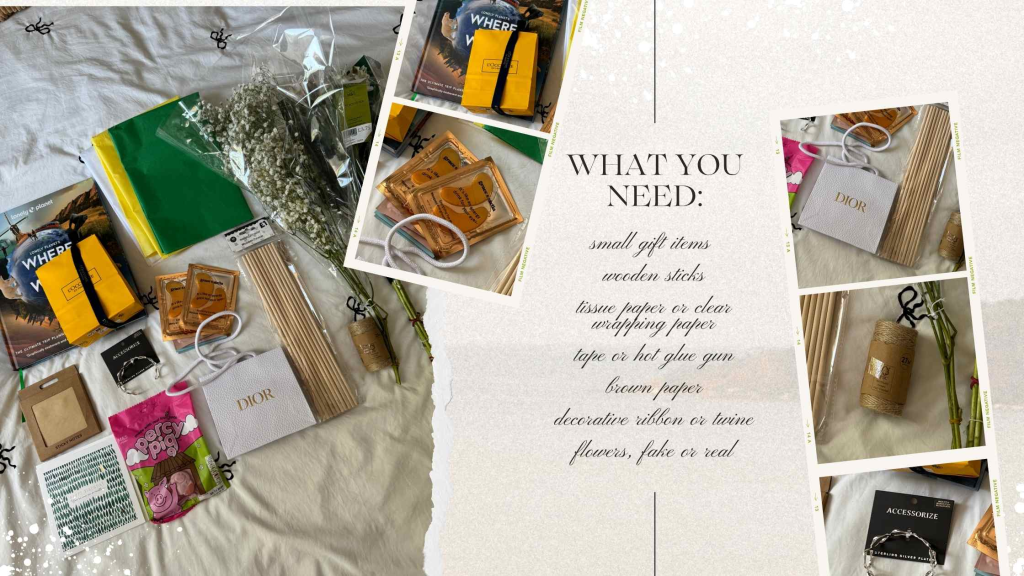
Supplies:
- Small gift items (books, candies, hand lotion, jewellery, skincare, gift cards, card etc.)
- Wooden dowels or skewers, popsicle sticks, craft stick etc.
- Tape or hot glue gun
- Tissue paper (clear wrapping paper would be best but I didn’t find any on time)
- Brown paper
- Twine or decorative ribbon
- Artificial or real flowers (I used baby’s breath and Lily of the Incas)
- Optional: handwritten notes, floral foam or styrofoam block, photos or polaroids, mini balloons.
How to Make a Gift Bouquet (Step-by-Step)
Step 1: Choose a Theme or Colour Palette
I went with forest green, pink, cream and gold for a dreamy but luxe vibe. You can go bold and bright, pastels, or even a black-and-gold glam look!
You can also lean into a theme that suits the recipient instead.
Here are some ideas:
- Spa Day (bath bombs, candles, face masks)
- Sweet Tooth (candy, gum, mini chocolates)
- Stationery Lover (pens, sticky notes, washi tape)
- Cozy Night In (tea bags, socks, lip balm)
- Book Lover (books, bookmarks, tea)
- Movie Night (popcorn, candy, Netflix gift card)
- Wellness Enthusiast (matcha, protein bars, quote cards)
Or pick a theme AND colour combo. The options are endless!
Step 2: Gather Your Gifts & Flowers
Choose a mix of small gifts, treats, and maybe even a few artificial or dried flowers for visual flair. Lay them all out so you can see what you’re working with.
Step 3: Wrap Delicate Gifts Before Gluing
If you’re including items like books, journals, or anything with a paper or cardboard cover, take a moment to wrap them in clear wrapping film or tissue paper. This keeps them safe from getting ripped or stained when you attach the sticks with tape or glue.
Step 4: Attach the Gifts to Sticks
Use hot glue or strong tape to attach each small gift to a wooden stick. This creates the “stems” of your bouquet. Vary the heights slightly to give the bouquet dimension. Be gentle with delicate items!
Step 5: Play With the Arrangement
Lay out everything on a square or rectangular sheet of brown kraft paper and play around with the layout until it looks just right. Place the tallest items in the back and layer the smaller ones in the front. You also want some variety in height and shape to keep things visually interesting.
Pro Tip: Take a quick picture of your arrangement on your phone! Sometimes seeing it through the lens helps you spot areas that feel too empty or too cluttered and it makes it easier to tweak before you start wrapping.
Step 6. Wrap the arrangement with brown paper
Wrap the brown paper around the base of your bouquet in a cone shape, just like a real flower bouquet.
Step 7: Secure The Base With Ribbon or Twine
I used twine to tie the base together, and it held together beautifully! No foam or fancy supplies needed. But if you’re working with heavier items or want extra structure, you can use floral foam or styrofoam with the wooden sticks anchored in place. Totally up to your style and what you’re including.
Step 8: Add Final Touches
Tuck in a heartfelt note or photo, and consider adding a mini balloon or two for extra flair.
Ready to Make Yours?
Making a gift bouquet for that special someone in your life is a heartfelt way to show appreciation and love. Whether you keep it simple or go all out, they’ll be touched that you took the time to make something just for them.
If you end up making one, I’d love to see it. Drop a comment or tag me. Let’s keep sharing the love and making gifting fun again!
📌 Pin This Idea for Later!
Don’t forget to pin this for later, or share it with a friend who lives for DIY crafts and thoughtful gifts.
Have questions or want me to help brainstorm bouquet themes? Drop a comment below. I’d love to hear from you!